
Table of Contents
Removing the battery from an HP laptop can be a necessary task for various reasons, such as replacing a dead battery, resetting the laptop, or performing maintenance. This comprehensive guide will walk you through the process of how to remove battery from HP laptop. We will cover the tools required, step-by-step instructions, and some essential safety tips.
Why Remove the Battery?
Before diving into the steps of how to remove battery from HP laptop, it’s important to understand why you might need to do so. Here are some common reasons:
Replacing a Faulty Battery
Over time, laptop batteries degrade and lose their ability to hold a charge. Replacing the battery can restore your laptop’s portability and performance.
Performing a Hard Reset
Sometimes, performing a hard reset can resolve various technical issues. Removing the battery is often part of this process.
Maintenance and Cleaning
Removing the battery allows you to access and clean other internal components, ensuring your laptop stays in optimal condition.
Tools Required
Before you begin, gather the necessary tools. Having the right tools on hand will make the process smoother and safer.
- Screwdrivers: Depending on your HP laptop model, you might need a Phillips or flathead screwdriver.
- Plastic Pry Tool: This helps in opening the laptop case without damaging it.
- Anti-static Wrist Strap: To prevent static electricity from damaging your laptop’s internal components.
- Small Container: To keep screws and small parts safe and organized.
Safety Precautions
When learning how to remove battery from HP laptop, following safety precautions is crucial to avoid damaging your device or causing personal injury.
Turn Off and Unplug the Laptop
Ensure your laptop is completely turned off and unplugged from any power source. This step is vital to prevent electrical shock and damage to the laptop.
Use an Anti-static Wrist Strap
Wear an anti-static wrist strap to prevent static electricity from damaging the sensitive internal components of your laptop.
Work on a Clean, Flat Surface
Perform the battery removal on a clean, flat surface to keep small parts from getting lost and to provide a stable environment for your laptop.
Step-by-Step Guide on How to Remove Battery from HP Laptop
Now, let’s get into the detailed steps of how to remove battery from HP laptop.
Step 1: Identify Your Laptop Model
HP laptops come in various models, each with a slightly different design. Identifying your specific model will help you find the exact instructions or manuals if needed. Usually, the model number can be found on a sticker on the bottom of the laptop.
Step 2: Locate the Battery
Depending on your HP laptop model, the battery can be located in different places. Some laptops have an external battery that is easily accessible, while others have an internal battery that requires removing the back panel.
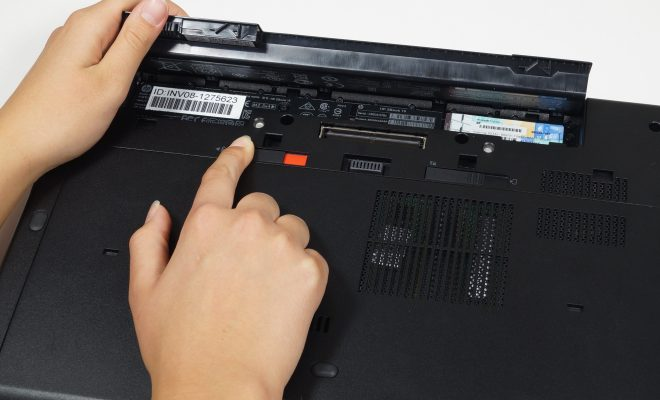
Step 3: Remove the External Battery (if applicable)
For models with an external battery, follow these steps:
- Slide the Battery Release Latches: On the bottom of the laptop, locate the battery release latches. Slide these latches to the unlocked position.
- Remove the Battery: Once the latches are unlocked, gently lift and remove the battery from its compartment.
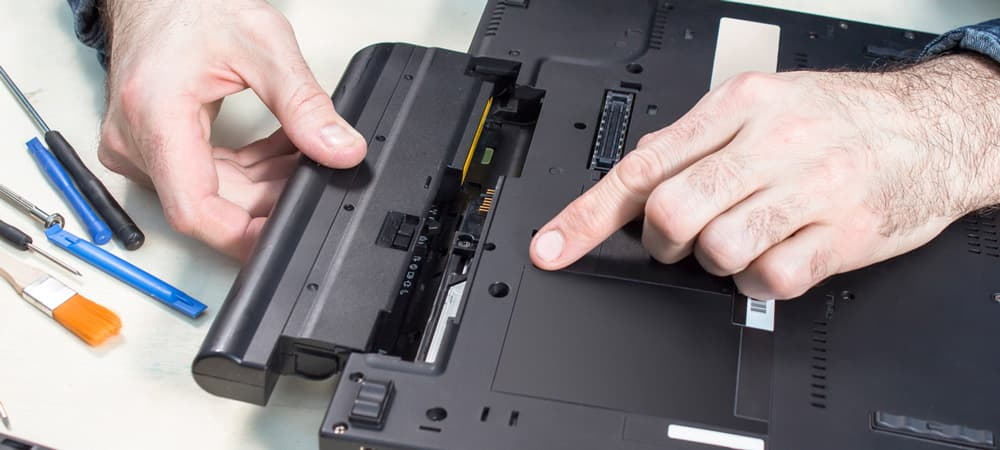
Step 4: Remove the Internal Battery
For models with an internal battery, the process is a bit more involved:
- Remove the Screws: Using the appropriate screwdriver, remove all screws securing the back panel of the laptop.
- Pry Open the Back Panel: Carefully use a plastic pry tool to lift and remove the back panel. Be gentle to avoid damaging the panel or the internal components.
- Disconnect the Battery: Locate the battery connector on the motherboard. Carefully disconnect the battery cable.
- Remove the Battery: Unscrew any screws holding the battery in place and gently lift the battery out of its compartment.
Step 5: Inspect and Clean
With the battery removed, take the opportunity to inspect the battery and the battery compartment. Look for any signs of damage or corrosion. You can also clean the battery compartment using a soft, dry cloth to remove any dust or debris.
Step 6: Install the New Battery (if applicable)
If you are replacing the old battery with a new one, follow these steps:
- Position the New Battery: Place the new battery in the compartment, ensuring it fits snugly.
- Reconnect the Battery Cable: Connect the battery cable to the motherboard securely.
- Screw the Battery in Place: Secure the battery with the screws you previously removed.
- Replace the Back Panel: Align the back panel with the laptop and press it into place. Replace and tighten all the screws to secure the panel.
Step 7: Power On the Laptop
Once the battery is installed and the laptop is reassembled, plug in the power adapter and turn on the laptop. Check to ensure the new battery is recognized and charging correctly.
Troubleshooting Tips
While learning how to remove battery from HP laptop, you might encounter some common issues. Here are some troubleshooting tips:
Battery Not Recognized
If your laptop does not recognize the new battery, try the following:
- Ensure the battery is properly connected to the motherboard.
- Check for any BIOS updates that might be required for the new battery.
- Perform a power reset by disconnecting the battery and power adapter, then holding down the power button for 30 seconds.
Laptop Not Powering On
If the laptop does not power on after reinstalling the battery:
- Double-check all connections and screws.
- Ensure the back panel is securely attached.
- Try using the power adapter without the battery to determine if the issue is with the battery or the laptop itself.
Conclusion
Learning how to remove battery from HP laptop is a valuable skill that can save you time and money. Whether you are replacing a faulty battery, performing maintenance, or troubleshooting issues, following the correct steps and safety precautions is crucial. By understanding your specific laptop model and using the right tools, you can efficiently and safely remove and replace the battery.
Remember, if you are unsure or uncomfortable performing any of these steps, it is always best to seek professional assistance to avoid damaging your laptop. With this guide, you should now have a comprehensive understanding of how to remove battery from HP laptop and handle any related tasks with confidence.